Rails 7 + vite_rails + Vue3
Table of Contents
本文是在 Rails7 安裝 vite_rails gem 使用 Vue3 開發前端頁面的筆記。
建立 Rails 專案 
執行指令建立 Rails 專案
rails new demo \
  -c=sass \
  --skip-javascript \
  --skip-hotwire
設定工作目錄,或是使用編輯器開啟 Rails 專案
cd demo
安裝 Vue3 
執行指令安裝
yarn add vue
安裝 vite_rails 
執行指令安裝
bundle add vite_rails
bundle exec vite install
vite_rails 會新增以下檔案:
app/frontend/entrypoints/application.js: Vite 預設的進入點bin/viteconfig/vite.json: Vite 專案設定,像是前端程式碼目錄與打包後的目錄位置vite.config.ts: Vite 設定檔,設定插件與建置參數
在 config/vite.json 中 vite_rails 設定了前端的進入點 app/frontend ,未來新增的前端資源都可以放在這下面。並建立 import 路徑的 Alias,讓我們在 javascript 中 import 專案目錄下的檔案時,可以用 @ 取代 app/frontend 少打幾個字。
vite_rails 會修改以下檔案:
app/views/layouts/application.html.erb: 加入載入 Vite 資源的 Helperconfig/initializers/content_security_policy.rb: 新增說明註解.gitignore: 新增排除 Vite 相關不需要版本控制的資源package.json: 新增 Vite packageProcfile.dev: 新增 Vite 指令
安裝 vite 插件 @vitejs/plugin-vue 以支援 Vue
yarn add @vitejs/plugin-vue
修改設定檔 
編輯 vite.config.ts
import { defineConfig } from 'vite'

import RubyPlugin from 'vite-plugin-ruby'
import vue from '@vitejs/plugin-vue'

export default defineConfig({
  plugins: [
    RubyPlugin(),
    vue()
  ],
  // <https://vitejs.dev/config/server-options.html#server-hmr>
  // Direct websocket connection fallback. Check out <https://vitejs.dev/config/server-options.html#server-hmr> to remove the previous connection error.
  server: {
    hmr: {
      clientPort: 3036,
    },
    strictPort: true,
  },
})
編輯 Profile.dev,確認只有一個 web
web: unset PORT && env RUBY_DEBUG_OPEN=true bin/rails server
css: yarn build:css --watch
vite: bin/vite dev
建立測試頁面 
建立 Controller 
我們需要一個 Controller 做為首頁,來載入進入點的 javascript。
執行指令建立 Controller
rails g controller home index
修改 View Template 
編輯 app/views/home/index.html.erb
<div id="app"></div>
設定路由 
編輯 config/routes.rb
Rails.application.routes.draw do
  get '/', to: 'home#index'
  match "/*path", to: "home#index", format: false, via: :get
end
開發前端頁面 
新增 app/frontend/pages/Home.vue
<template>
<h1>{{message}}</h1>
<p>
Learn more with the
<a
href="https://v3.vuejs.org/"
target="_blank"
rel="noopener"
>Vue Docs & Resources</a>.
</p>
<button @click="doSomething">Say hello.</button>
</template>
<script setup>
import { ref } from 'vue'
const message = ref('Hello Vue!')
const doSomething = () => { alert('Hello!') }
</script>
編輯 app/frontend/entrypoints/application.js
import {createApp} from 'vue';

import Home from '@/pages/Home.vue';

const app = createApp(Home);
app.mount('#app');
新增樣式 
修改 app/assets/stylesheets/application.sass.scss
#app {
  font-family: Avenir, Helvetica, Arial, sans-serif;
  text-align: center;
  color: #2c3e50;
  margin-top: 60px;
}

a,
button {
  color: #4fc08d;
}

button {
  background: none;
  border: solid 1px;
  border-radius: 2em;
  font: inherit;
  padding: 0.75em 2em;
}
測試 
啟動 rails dev server
bin/dev
開啟瀏覽器 http://localhost:3000
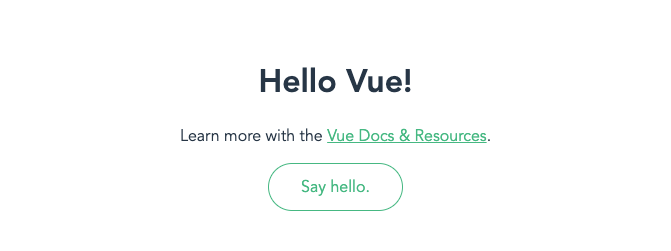
接下來我們就可以在 app/frontend 下使用 Vue3 與其他 Javascript Library 開發前端頁面了。
Bonus 
使用 foreman 時
如果重新執行 `bin/dev`` 發現 3000 port 被佔用了,這可能是上次啟動的 Rails Server 並未成功停止。我們可以使用 thoughtbot 寫的腳本來強制 kill 佔用 3000 port 的 process。
#!/bin/sh

# Kills the process running on the provided port
#
# clear-port 3000

if [ -n "$1" ]; then
  port_num="$(lsof -ti4TCP:"$1")"
  if [ $? -eq 0 ]; then
    kill "$port_num"
  fi
else
  echo >&2 Usage: clear-port port-number
  exit 1
fi
將其儲存成執行檔 `clear-port`` 放到環境路徑中,就可以如下使用,強制停止佔用 3000 port 的 process。
cleat-port 3000